Product appearance introduction
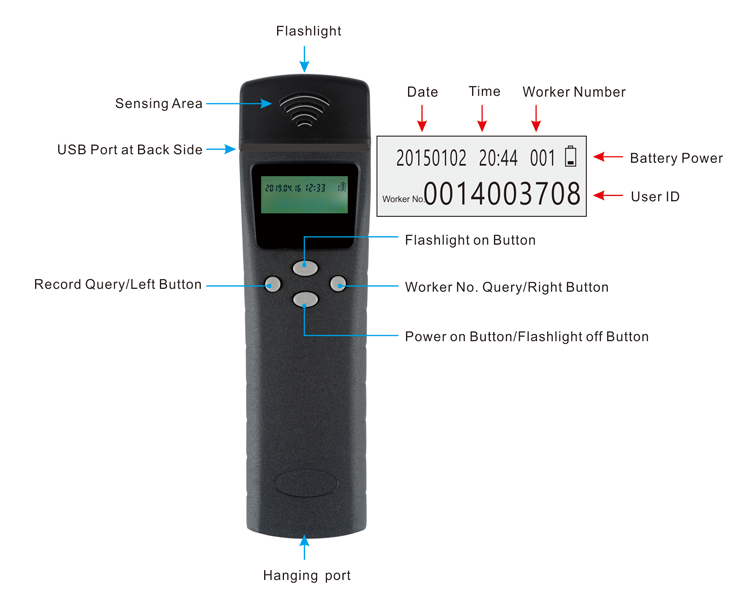
1.Set Up Patrol Machine
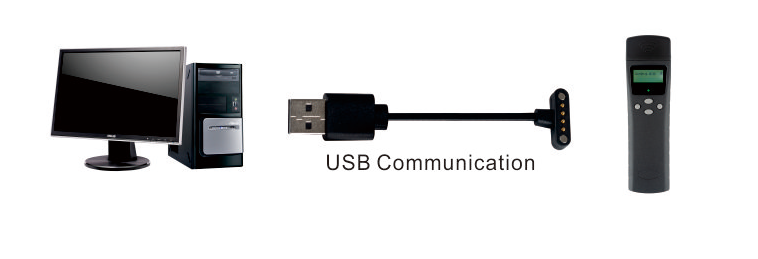
Communicate with the computer through USB communication line, and use the patrol software to transmit the patrol personnel and parameter information to the patrol machine.
2. Select Patrol Personnel
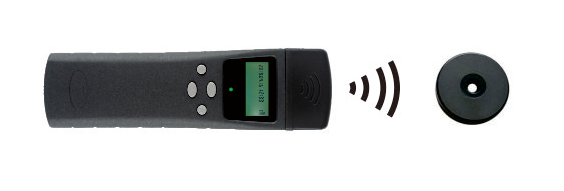
Method 1: start the machine, and the patrol machine reads the corresponding personnel button information.
Method 2: turn on the machine, press the "Job Number Query" key, turn to the corresponding patrol personnel information, and press the "Power On" key for 2 seconds to complete the switching of patrol personnel.
3. Patrol Sign In

Turn on the machine, put the "Sensing Area" close to the patrol point, and after hearing the prompt tone and vibration prompt, it means that the sign in is successful.
4. Collect data

Communicate with the computer through USB communication line, use the patrol software to collect the data in the patrol machine, and then realize the record query and report output.
Instructions for use
1. Charge the new patrol machine (or when it is not used for more than 3 months) for more than 8 hours to ensure sufficient battery power.
2. Before patrol inspection, set the job number of patrol personnel firstly, so that the generated patrol record is associated with yourself.
3. After starting up, the patrol point can be sensed. After sensing the patrol point, the patrol machine will send out a prompt sound accompanied by vibration, and automatically save the data.
4. After starting up, if the patrol point is not sensed within a certain period of time, the patrol machine will automatically sleep.
5. In the power on state, press the "Flashlight On" key, the flashlight light will be on, and then press the "Flashlight Off" key, the light will be off. If the light off key is not pressed, the light will automatically turn off after a certain time (the duration of light on and hold can be set to 1-60 seconds, which is 5 seconds by default). Note: flashlight consumes more power, so it is recommended to set the duration of turning on and holding the lamp to be applicable.
6. After power on, press the "Record Query" key, and then turn left / right to browse the records.
7. After starting up, press the "Job Number Query" key, and then turn left / right to browse the job number and the corresponding card number.
8. Insert the mini end of the equipped communication cable into the USB port of the patrol machine, and connect the other end to the USB port of the computer to communicate with the computer.
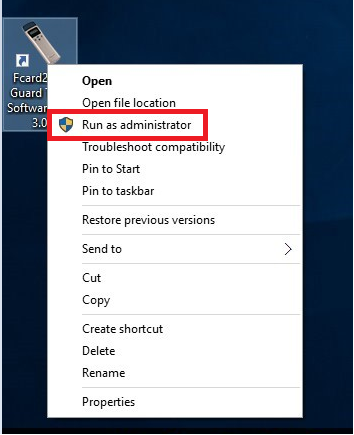
9. Most computers do not need to install patrol machine drivers, but some computers do. The drive file is in the root directory of the patrol system software. (Please refer to computer driver installation method )
10. Please use the matching charger for charging, and the charging effect will be better. If the USB port of the computer is used for charging, it may be become fake charging, slow charging or overcharging due to the slightly small USB current of some computers so that damaging the patrol machine.
11. When there are no patrol personnel in the patrol machine, the personnel job number and "Job Number" on the display screen flash after starting up.
12. During the patrol check-in, you shoule make sure that the distance between the patrol machine and the patrol point is within 2cm. Because the patrol machine will not be able to sense the patrol point if it is too far away.
13. When the "Record" on the display flashes after turning on the machine, it means that the card reading record or system record stored in the patrol machine reaches 90% of the storage space. At this time, please use the computer to collect the data in the patrol machine.
14. The interior of the patrol machine is a precision electronic circuit. Please do not use it to knock hard objects or immerse it in water, which will cause damage or damage to the patrol machine.
15. The patrol machine adopts radio frequency identification (RFID) technology. There should be no metal objects between them when identifying the patrol point. It will cause the patrol machine to be unable to identify the patrol point.
16. Please do not disassemble or refit the patrol machine without permission to avoid damage to the patrol machine.
Software Operation Instructions
main interface display
The main interface after login is shown as below:
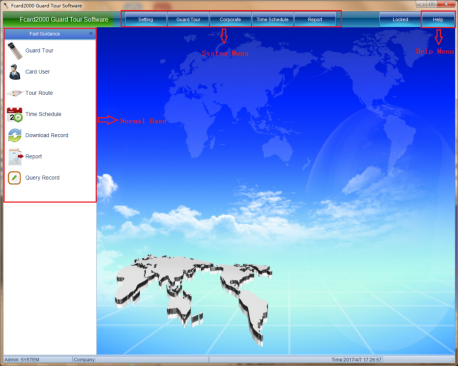
The main interface is divided into three areas: system menu area, common function area, and system help menu.
Quick navigation bar
The shortcut navigation bar contains the commonly used functions, and it is the shortcut way to open some submenus in the system menu of the main interface. As shown below:
The functions of each menu are briefly introduced here. For detailed operations, please refer to the detailed introduction of the system menu.
1. Equipment management: Add, parameter setting, and delete operations of patrol machine equipment. For details, please refer to Device Management
2. Personnel information: Add, modify, view and delete operations of patrol personnel. For specific operations, please refer to the personnel information
3. Route information: Add, modify, view and delete operations of patrol routes. For specific operations, please refer to the line information
4. Patrol plan: Add, modify, view and delete operations of patrol plan. For specific operations, please refer to Patrol Plan-Manage Patrol Plan
5. Collecting data: Patrol records, collection of system records, and synchronous operation of personnel in patrol machines. For details, please refer to Collecting Patrol Records
6. Data report: query the patrol records of a certain period of time according to the patrol plan, and count the number of early arrivals, late arrivals, missed inspections, and normal patrols. For specific operations, please refer to the query report.
system message
database management
Tip: If the SQL database server address or computer name is not the local address or computer name of the patrol machine software, because the new version of SQL cancels the support of some technologies, you will not be able to perform backup and restore operations in the software. and restore, please go to the SQL server to set up automatic backup (for the method, please refer to the FAQ of SQL Server Automatic Backup Setting and Restoring Backup).
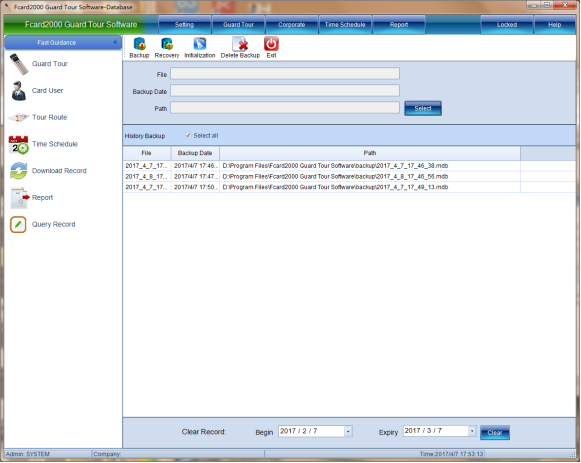
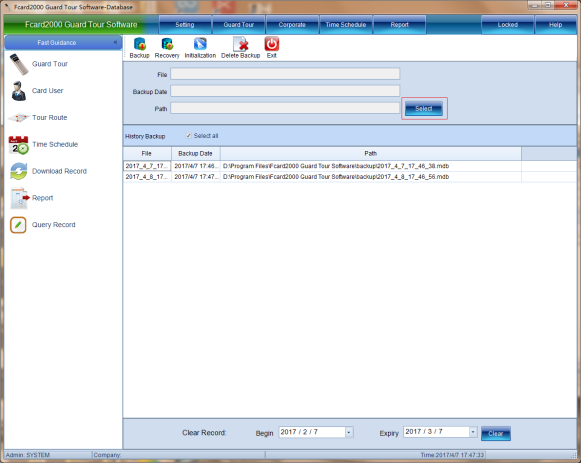
On the main interface of the system, click [System Information]--->[Database Management] to backup, restore, delete backup files and clear the patrol records in the database. The interface is as shown below:
Click [Database Management] to enter the interface as shown below:
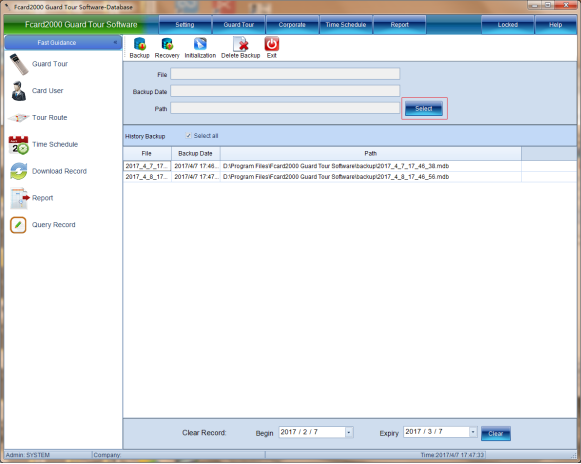
Backup database
If the currently selected folder is different from the last one, the current folder is used as the backup save path. The backup file list listed in the table is the files under the current save path when the management interface is opened next time. If you want to display the previous save path Please move these files to the new folder and reopen the database management interface to see the moved files. Click [Backup Database], this interface appears, and then click [Save Path]. As shown below:
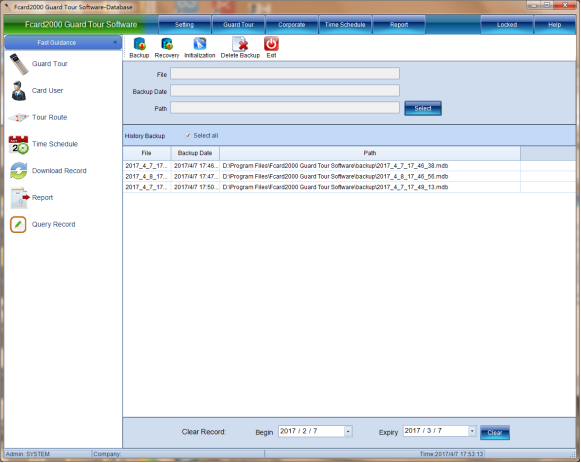
Select the folder location where the backup database is to be stored, and then click [Save], as shown in the following figure:

Click [Yes] in the pop-up confirmation prompt "Whether to save the backup file", and then a prompt window "Database backup is successful" will pop up and click [OK], the backup of the database is completed. In the data management interface, the backed up data, backup time and file path will also be displayed, as shown in the following figure:
Restore database
Click to select the backup file that needs to be restored in the table, and then click [Restore Database] to restore it, as shown in the following figure:
After clicking [Restore Database], a prompt window will pop up. As shown below:
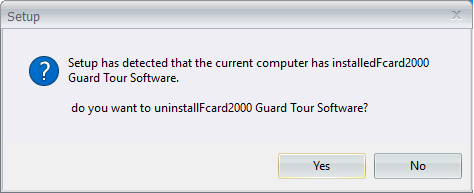
Click [Yes], and a prompt window "Database recovery is successful" will pop up, click [OK], the database recovery is successful.
Initialize the database
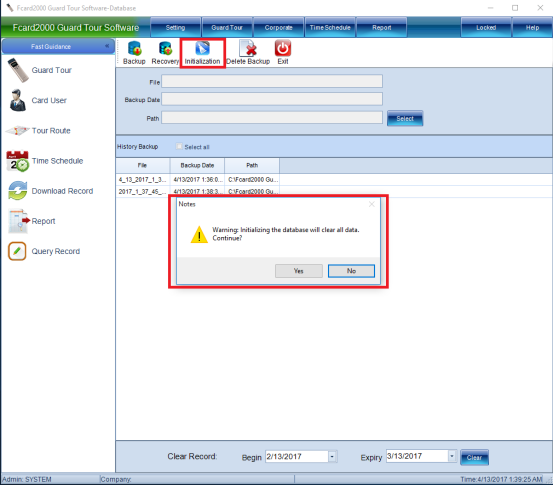
Initializable data, when not needed, as shown in the following figure:
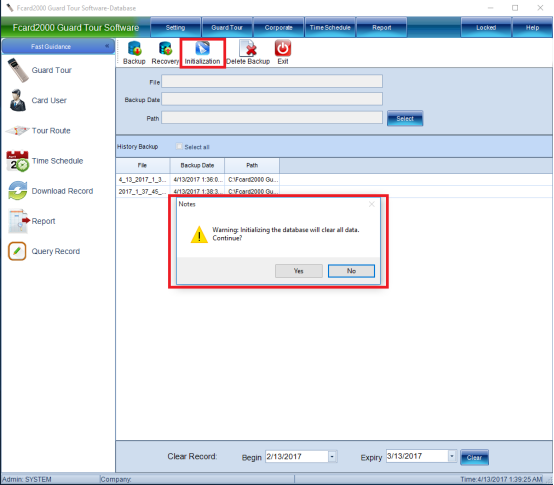
Click [Restore Database], a prompt window will pop up, click [Yes] on the prompt window to initialize the database, that is, clear all data in the database.
Tip: Initializing the database will clear all data in the database! Do this with caution!
Delete backup file
Select the backup file to be deleted, and then click [Delete Backup File] to delete the selected backup file, as shown in the following figure:
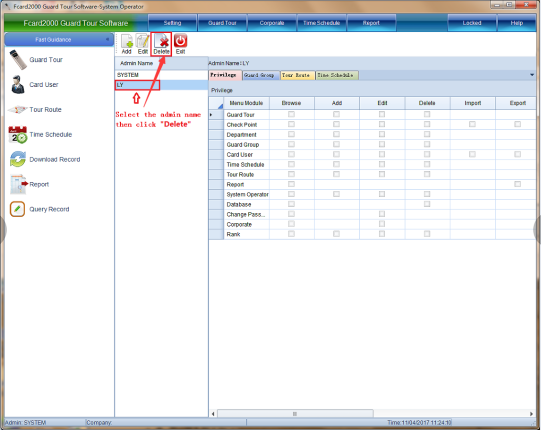
Click [Yes] to delete the database.
Admin management
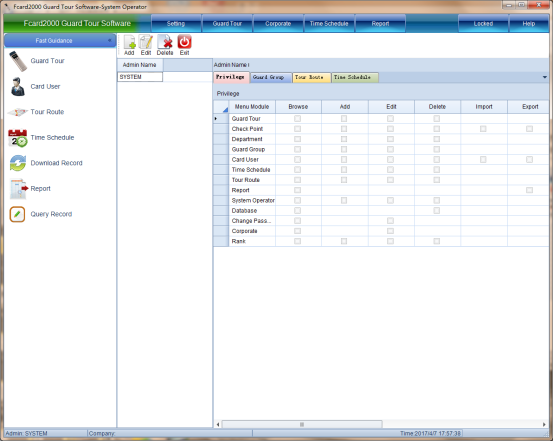
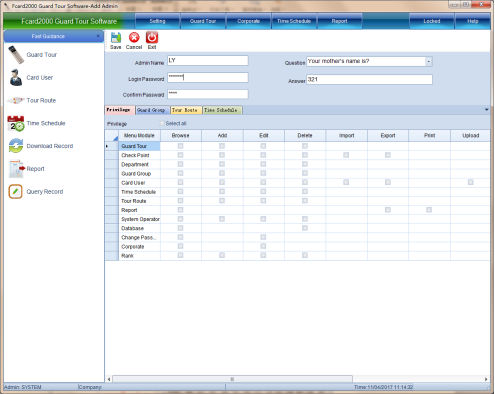
Users who use the patrol management system software can be added, modified and deleted, and the permissions of each user can be flexibly set, and the permissions, groups, routes and plans that can be managed by each user can be specified.
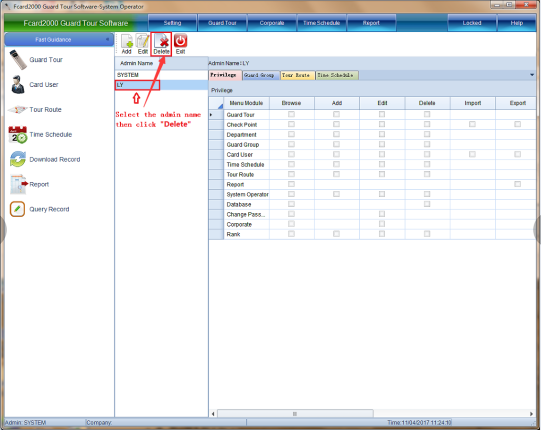
Click [System Information] ---> [Administrator Management], as shown in the following figure:
Click [Administrator Management] to enter the interface as shown below:
Add administrator
Add administrator, set the username and password of the administrator to be added, select the password to ask questions, and enter the password answer (if you forget the password when logging in with this account, you can reset the password through the answer, please save the answer in case you forget the password You can also use other authorized users to modify the user's password after logging in.) And specify the authority to use each module of the software, manageable groups, lines, and plans.
Click [Add Administrator], as shown in the following figure:
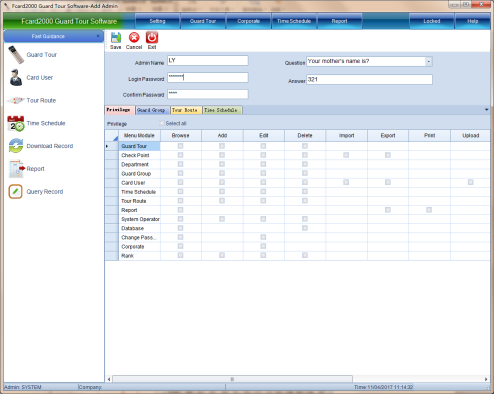
The administrator's authority is divided into three types: management group, management line, management plan
Managed group: its group needs to be set in the following [Personnel Information] ---> [Management Group].
Managed line: its line needs to be set in [Route Management]--->[Line Information] below.
Managed plan: Its plan needs to be set in [Route Management]--->[Route Plan] below.
If you do not specify any authority, then logging in with this administrator will not display any modules of this software. After entering the corresponding content, click [Save]
A prompt window will pop up, "Administrator Zhang San has been added successfully", click [OK], and the administrator will be added successfully.
Edit administrator
The administrator's username, password, password answer, permissions, manageable groups, lines, and plans can all be modified. (The SYSTEM user is a built-in account and cannot be modified), select the administrator whose information needs to be modified, and then click [Modify administrator] as shown below:
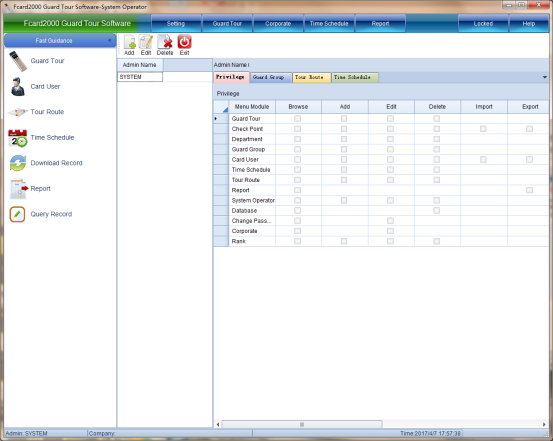
After clicking [Modify Administrator], you will enter the interface as shown below:
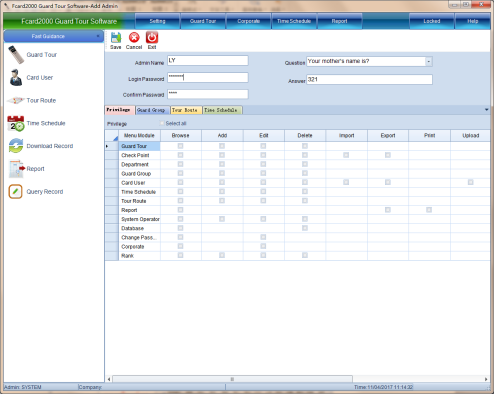
After modifying the relevant information of the administrator and the authority of the administrator, click [Save], and a prompt window will pop up "Administrator Zhang San has been modified successfully", click [OK], and the modification of the administrator information is completed.
Remove admin
In the administrator management interface, select the administrator to be deleted (the SYSTEM user cannot be deleted as a built-in account), and then click [Delete Administrator], as shown in the following figure:
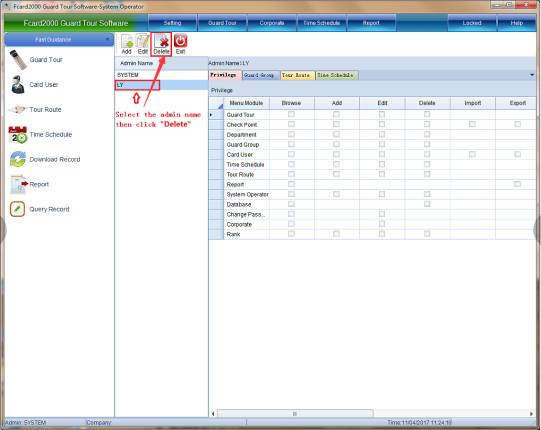
Click [Delete Administrator], a prompt window will pop up, "Are you sure you want to delete the information of the selected person", click [Yes], and then a prompt window "Delete successful" will pop up. Click [OK], and the administrator will be deleted successfully.
Change Password
Click [System Information]--->[Modify Password], as shown below:
Click [Modify Password] to modify the password of the currently logged in administrator, as shown in the following figure:
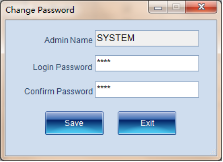
Enter the newly set password in the "Login Password" input box, and enter the newly set password again in the "Confirm Password" field. After the modification, click [Save], and a prompt window "Password changed successfully" will pop up, click [OK] , the login password is changed successfully.
Switch administrator
Click [System Information]--->[Switch Administrator], as shown below:
Click [Switch Administrator], the system will be logged out immediately, and the login interface will pop up, as shown in the following figure:
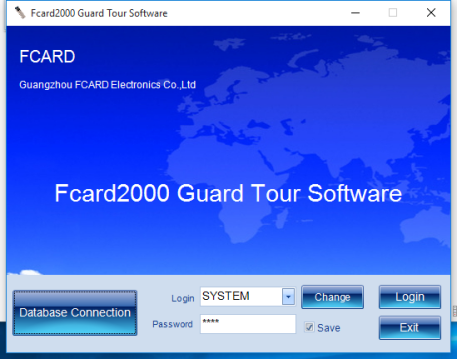
On the login interface, you can select another administrator to log in to the main interface again.
Exit system
Click [System Information] ---> [Exit System] to directly exit the software system, as shown in the following figure:
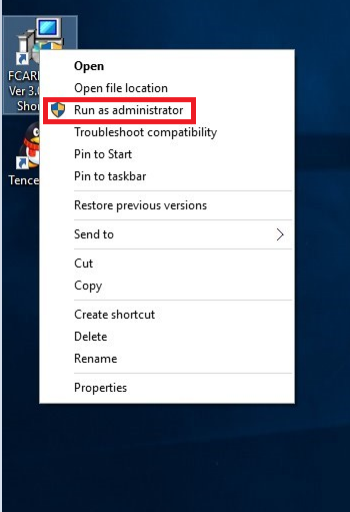
Click【Exit System】to exit the software system immediately.
Device management
Device management
Click [Device Management]--->[Device Management], as shown below:
To manage the patrol device, please connect to the patrol device, otherwise, a prompt that the device is not connected will pop up during communication. As shown below:
Click [Device Management] to enter the interface as shown below:
Add patrol machine
Click [Add Patrol Machine], a search patrol machine window will pop up, as shown in the following figure:
After waiting for a while, after searching for the consumer machine, an interface will pop up, as shown in the following figure:
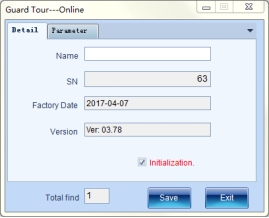
Basic information and parameter settings can be set on the patrol machine.
1. Basic information
The name of the device (can be entered manually, and cannot be the same as other installed patrol machines)
Device serial number, date of manufacture, version number (the name in the basic information column can be modified, other information cannot be repaired, and can only be obtained from the connected device)
Initialize the patrol machine (if the initialization patrol machine is checked when clicking [Save], all personnel in the device will be cleared, all card reading records will be cleared, system records will be retained, and default parameters will be restored. Please use this function with caution!)
Set the basic information as shown above.
2. Parameter setting
Set the power-on hold time of the patrol machine (power on, how many seconds to turn off the screen after the device is not operated)
Lighting hold time (how many seconds the flashlight will automatically turn off after being on)
Device time (sync the device time to the time of the connected computer)
Record storage method:
Record storage methods can be divided into two types: one is full cyclic overwrite, and the other is full without overwriting. (Up to 100,000 patrol records and 50,000 system records can be stored)
When the record is full, the next record will overwrite the first record, and the cycle will continue. If the user wants to keep the perfect record, it is recommended to select the full-not-overwrite method to store the data.
Full storage does not overwrite means that no new records will be stored when the records in the device are full.
The setting parameter information is set as shown in the following figure:
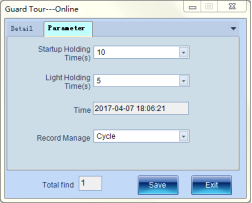
After setting, click [Save], a prompt window will pop up "Device patrol 1 added successfully", click [OK], the patrol machine can be added successfully. Information about the newly added patrol device will also be displayed in the device management interface, as shown in the following figure:
Modify the patrol machine
Select the patrol machine to be modified, and then click [Modify patrol machine], as shown in the following figure:
After clicking [Modify Patrol Machine], the following interface will pop up:
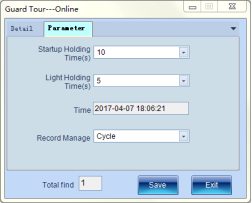
Modify the parameters of the selected patrol machine (the selected patrol machine must be connected to the computer through a USB cable). (If the initial patrol machine is checked when clicking [Save], all personnel in the device will be cleared, all card reading records will be cleared, system records will be retained, and default parameters will be restored. Please use this function with caution!)
delete patrol machine
Delete the patrol machine information that has been saved in the database, no need to connect the device. Select the patrol machine to be deleted, and then click [Delete patrol machine], a prompt window will pop up, as shown in the following figure:
Click [Yes] to delete the patrol machine.
Data collection
Collect patrol and system records from the connected patrol machine, and synchronize the personnel list of the patrol machine with the database. The synchronous patrol personnel is bidirectional. If there are personnel with the same job number in the device and the database, but the card number and name are different, you can choose whether the list in the device or the list in the database shall prevail. If the former is The former list of criteria covers the latter, and conversely, if the latter is the criterion, the latter list covers the former. If there is a list in the database but not in the device, it will be directly synchronized to the device. If there is a list in the device but not in the database, it will prompt whether to delete or synchronize to the database. (Hint: Data collection and synchronization personnel must be connected to the patrol machine to carry out).
Click [Collect Data] to pop up the interface as shown below:
Click the [Collect] button in the three columns of [Collect Patrol Records], [Collect System Records], and [Synchronize Patrol Personnel] to collect Patrol Records, System Records, and Synchronized Patrol Personnel Information.
Personnel information
Corporate Information
Click [Personnel Information] ---> [Enterprise Information], you can set the company's enterprise information, the company's name, telephone, fax, website, person in charge, company description, and company address information. As shown below:
Click [Enterprise Information], and the interface as shown below will pop up:
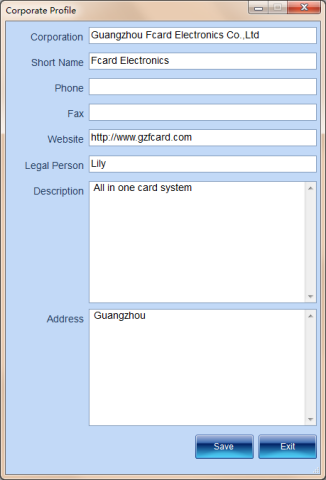
After setting the information, click [Save].
Department Information
Manage department information, so that the department to which the person belongs can be specified in the subsequent patrol personnel management. Click [Personnel Information]--->[Department Information], as shown below:
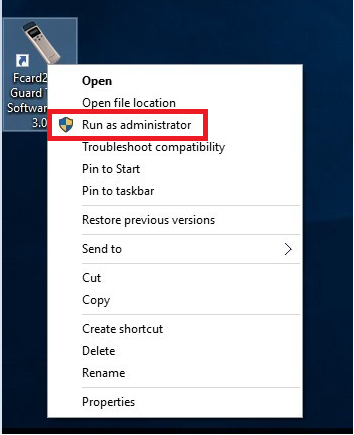
Click [Department Information] to enter the interface as shown below:

The default department is a built-in department, which cannot be modified or deleted. The default department of the patrol personnel is this department, and other departments can also be designated (after adding a new department, they can be designated to other departments).
add department
Add a new department and specify which people belong to this department (a person can only belong to one department). Click [Add Department], the following interface will appear:
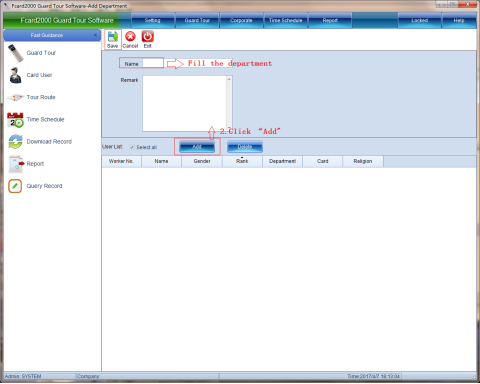
Enter the name in "Department Name", optionally enter the department description, or add personnel, click [Add Personnel], and the interface as shown below will pop up:
After clicking [OK], the newly added personnel will also be displayed in the new department interface, as shown in the following figure:
If this person does not belong to this department or do not want this person to be in this department, you can select this person, and then click [Delete Person] to delete the person, as shown in the following figure:
Click [Delete Person], and in the interface of adding personnel, it will be displayed that the person to be deleted no longer exists in this interface. After adding the personnel, click [Save], and a prompt window will pop up "Department and Personnel Department has been added successfully", click [OK] to add the department successfully.
Modify Department
Select the department that needs to be modified, and then click [Modify Department] to modify the name, description, and personnel of the department. As shown below:
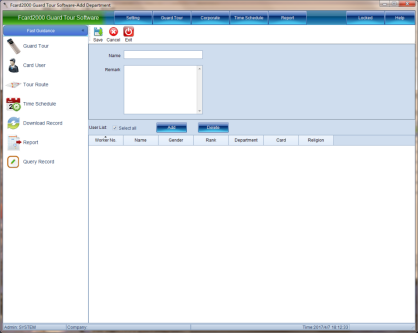
After clicking [Modify Department], you will enter the interface as shown below:
In this interface, you can modify the department name, department description and other information, and you can also add and delete personnel. After modifying the information, click [Save], and a prompt window will pop up "Department Personnel Department has been modified successfully", click [OK] , modify the department successfully.
Delete department
Select the department to be deleted, and then click [Delete Department], as shown in the following figure:
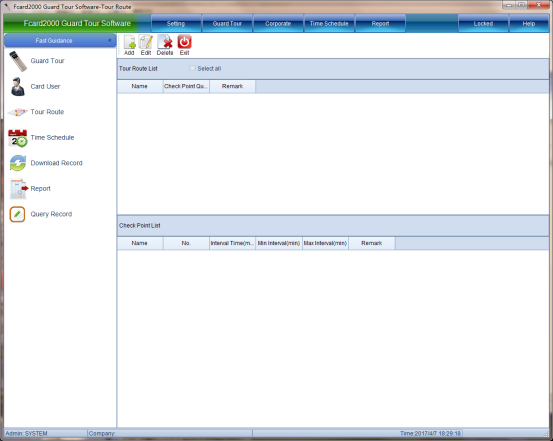
A prompt window will pop up "Are you sure you want to delete the selected department information", click [Yes], and then a prompt window "Delete successful" will pop up, click [OK] to delete the department, and the people under the deleted department will return to the default department under.
Job information
Manage job information, so that when adding new personnel later, you can specify which job the patrol personnel are. This job is the default job position and cannot be modified or deleted.
Click [Personnel Information]--->[Job Information], as shown below:
Click [Job Information] to pop up the interface as shown below:
Operations such as adding, modifying, and deleting positions can be performed on personnel positions.
new job
Add new jobs. Click [Add Job] to pop up a window as shown below:
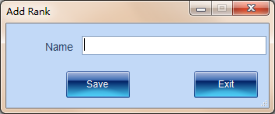
Enter the job name, and then click [Save], a prompt window will pop up "Added successfully", click [OK], the job is added successfully. After the new job title is added, the newly added job title will be displayed in the "Job Information" interface, as shown in the following figure:
Modify position
To modify the existing job title, select the job title that needs to be modified, and click [Modify Job], as shown in the following figure:
Click [Modify Position], and the following window will pop up:
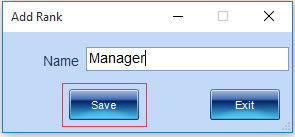
Fill in the modified name in the position name, and then click [Save], a prompt window will pop up, "Modification is successful", click [OK], the name modification is successful. In the "Job Information" interface, you can also see the modified job title, as shown in the following figure:
Delete job
Delete the selected position, and set the position of the patrol personnel belonging to this position as the default position: staff. As shown below:
After clicking [Yes], a prompt window "Deletion Successful" will pop up, click [OK], and the job title will be deleted successfully.
Personnel Information - Manage Patrol Personnel
Click [Personnel Information]--->[Personnel Information], as shown below:
Click [Personnel Information] to manage the personal information of patrol personnel. As shown below:
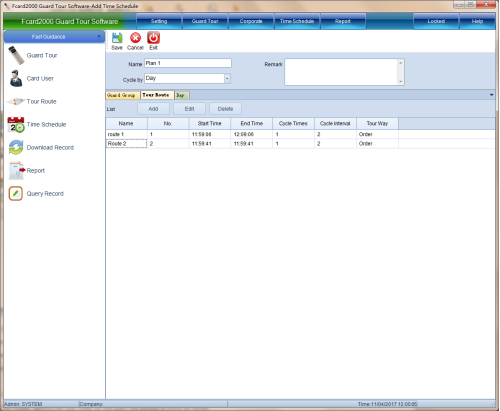
In the "Personnel Information" interface, operations such as adding, modifying, deleting, uploading, exporting, and importing personnel can be performed.
Add staff
Click [Add New Person], and the interface as shown below will pop up:
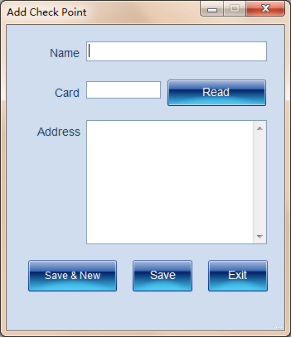
Before adding new personnel, you must ensure that the patrol machine is connected to the computer through a USB cable, and then click the "Patrol Machine Reader Number" in the above picture, and a prompt window will pop up, as shown in the following figure:
Click [OK], the card number can be read by connecting to the patrol machine, put the ID card in the card reading area of the patrol machine, you will hear a "di" sound, and the read card number will be displayed in the new personnel interface. Display the read card number, as shown below:
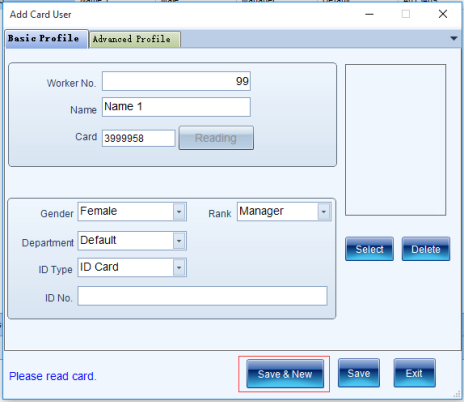
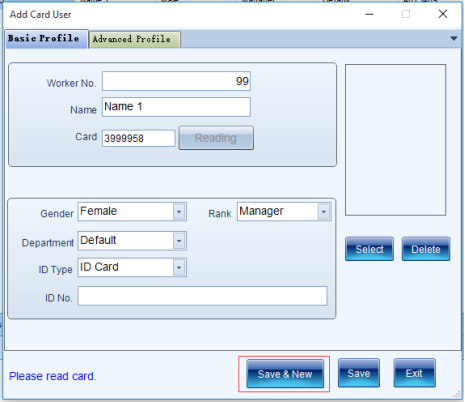
Then, in the basic information, you can set the patrol personnel's job number, name, card number, gender, position, department and other information (the job number, name, and card number are required items).
In the detailed information, you can optionally fill in information such as ethnicity, place of origin, telephone number, address, etc., as shown in the following figure:
After filling in the information, if you want to continue to add personnel, click [Save and Add], and then read the next card, so as to continuously read and save. If you do not need to add any more personnel, click [Save], and a window will pop up, as shown in the following figure:
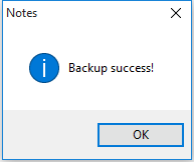
Click [OK], and the personnel information just added will be displayed in the "Personnel Information" interface, as shown in the following figure:
Modifier
Modify the personal information of the selected person. Click [Modify Person], as shown in the following figure:
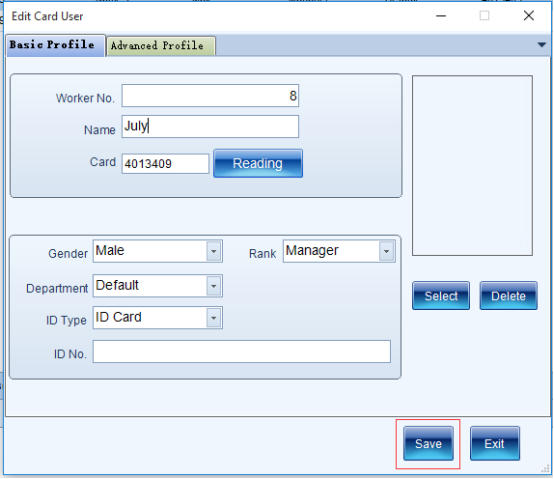
After clicking [Modify Person], you will enter the interface as shown in the figure below. Relevant information can be modified:
In this interface, you can modify the personnel information. After the modification is completed, click [Save], and a window will pop up, as shown in the following figure:
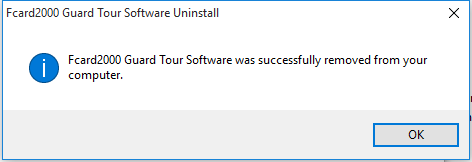
Click [OK] to modify the personnel information successfully.
delete people
Select the patrol personnel to be deleted, and then click [Delete personnel], as shown in the following figure:
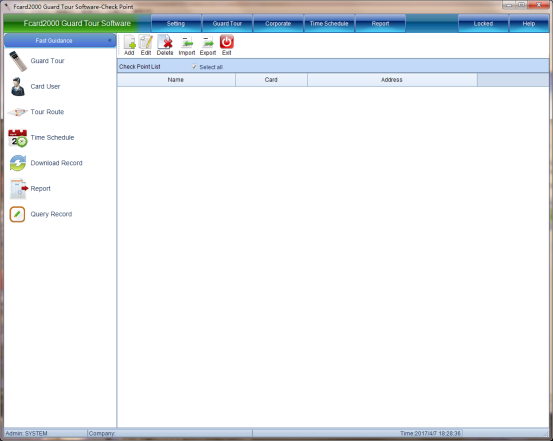
After clicking [Delete Person], a prompt window will pop up "Are you sure you want to delete the information of the selected person", click [Yes], and a prompt window "Delete successful" will pop up, click [OK] to complete the deletion. In the "Personnel Information" interface, the deleted personnel do not exist in this interface, as shown in the following figure:
uploader
Upload the selected personnel to the device (if the personnel information of the same job number already exists in the device, the personnel information in the device will be overwritten, please make sure that the patrol device has been connected). Click [Upload Person], as shown below:
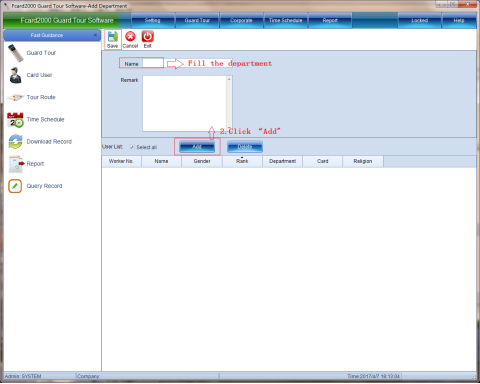
Click [Upload Person], wait for a while, a prompt window will pop up, indicating that the upload is complete, click [OK], the upload is complete.
If the card numbers of some of the uploaded personnel already exist, the personnel who do not have card numbers will be uploaded. If you need to upload the personnel with duplicate card numbers, you need to modify the card numbers of these personnel before uploading again. If it exists, the following interface will pop up:
Click [OK] to upload the non-existent card number, and the person with the duplicate card number needs to modify it before uploading again.
Export people
Click [Export Staff] to export staff information to a file (CSV file). As shown below:

Click [OK] in the prompt window. If there are duplicates or duplicate card numbers among the imported personnel, a prompt window will pop up, as shown in the following figure:
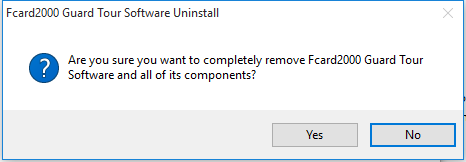
Click [OK], and the imported file will be opened immediately, as shown in the following figure:
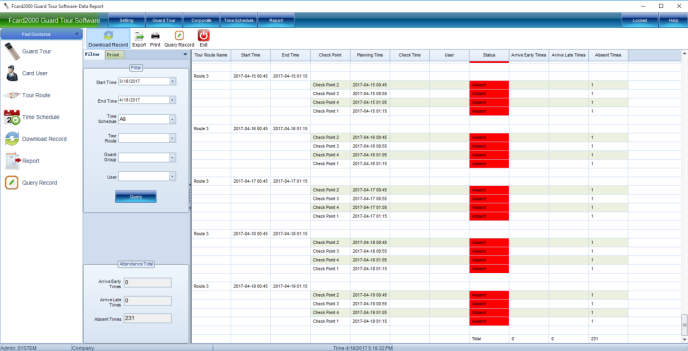
Query report
Set the start time and end time to be queried. The default start and end time is from this day of the previous month to the current time. You can change the start and end times at will. The span of the start and end times cannot exceed 365 days. If you want to query reports that exceed 365 days, Please export or print the query in multiple times.
Selected plan: You can select one of the plan queries or directly use the default all plan queries.
When selecting a single plan query, you can select which line, which group, or which person's conditions to query, and if it is all plans, query the patrol results of lines, groups or people in all plans.
Click [Query] to query the plan content, as shown in the following figure:
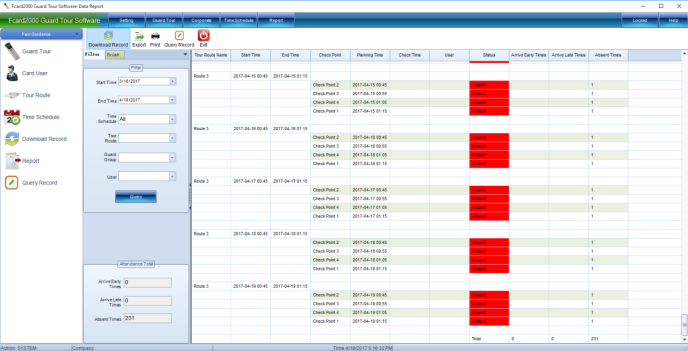
You can enter conditions for conditional query, and select different conditions to query records according to your needs. According to the collected original patrol records, the patrol report is calculated according to the time range and the formulated plan, and the number of normal, early, late, and missed inspections is counted. (If the plan is modified, the generated report will also change, because the result of the report is calculated based on the plan, and it is normal, early, late, and missed)
Credit card record
Click [Card Swipe Record] in the interface to query the card swipe record of the patrol personnel, enter the patrol personnel and the patrol location to be queried (support fuzzy query, if you do not enter anything, query all) to enter the interface as shown below:
Enter the condition query, and then click "Query" to query the credit card record. You can enter the corresponding conditions as needed to query the required credit card record.
Export report
According to the results of the query, it is exported to a CSV file. Click [Export Report] to pop up the interface as shown below:
Select the storage path of the exported file, enter a file name that you can easily remember in "File Name", and then click [Save], a prompt window "Export Complete" will pop up, click [OK], and the report is exported successfully.
Print report
Print a report based on the query results. There is a print option for printing reports, which allows you to select which columns of the report to print and which columns to not print. As shown below:
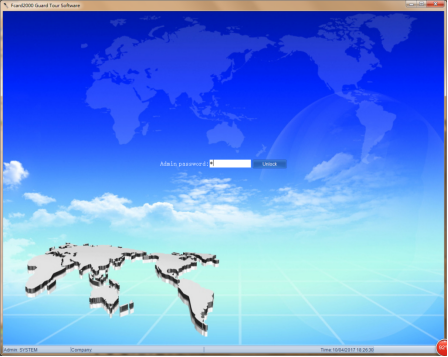
Lock software
Click to lock the software to unlock the software with the currently logged in administrator password. As shown below:
common problem
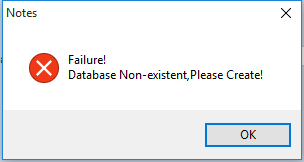
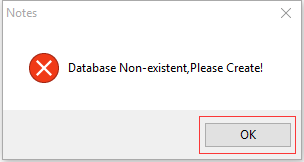
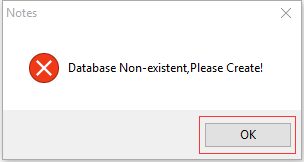
Prompt database does not exist
For example, as shown in the following figure:
Using an Access database
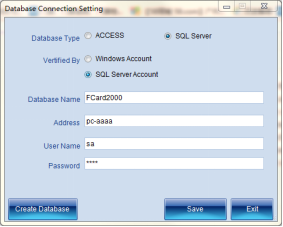
If you are using an Access database, the database file has been deleted or moved to another place by mistake. If it is deleted, please re-create the database in "Set Database Connection" (the new database is a blank database without previous data); if it is moved to another place, put the removed database file back into the original database directory If you don't know where the original database directory is, please click "Create Database" in "Set Database Connection", the path displayed in the pop-up window is the directory where the database was originally placed. After getting the original path, close the creation window. , put the database files back in the original directory.
Use MSSQL database
If you are using an MSSQL database, the MSSQL database has been deleted or renamed. Please open the management software of the MSSQL database to check whether it has been deleted or renamed. If it is deleted, click "Set Database Connection" to recreate it. If it is renamed, change it back in the MSSQL management software, such as SQL2005, select [Start Menu >> All Programs >> SQL under the Microsoft SQL Server 2005 folder Server Management Studio], open as shown below:

The server can't connect
For example, as shown in the following figure:
Please check whether the computer name or IP address of the MSSQL server is correct, and whether the related services of the SQL server are enabled. If the services are not enabled, open the Windows system [Control Panel>>Administrative Tools>>Services, find the SQL-related services and start these services. , if the server is a remote machine, please make sure it is powered on. As shown below:

There is also to check whether the user name and password set in "Set Database Connection" are correct.
Problems with the connection in the patrol machine
Indicates that the device is not connected
For example, as shown in the following figure:
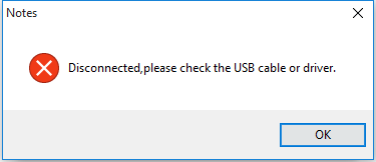
1. When this prompt appears, please check whether the patrol machine is connected to the computer. If it is connected to the computer, please check whether there is a hardware failure in the patrol machine, and check whether there is any problem with the data cable connected to the patrol machine. Determine which is the cause by replacing the data cable or checking the device.
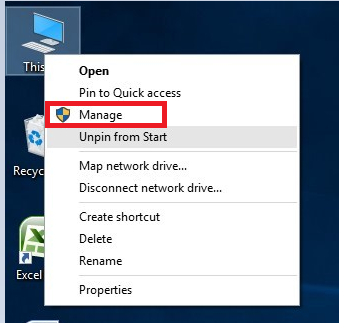
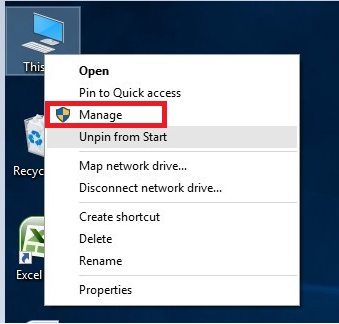
2. Please check whether the USB serial port driver is installed, right-click "My Computer" on the Windows desktop and select "Manage", as shown in the following figure:
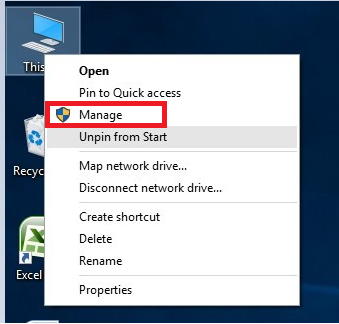
Click on the management manager to check whether the USB device in the right window has a yellow question mark, as shown in the following figure:
If the USB device has a yellow question mark, the driver is not installed, please run the CH341SER.EXE program under the “driver” folder in the software installation directory, and click [Install]. As shown below:
When this prompt appears, please check whether there is a problem with the connection of the patrol device, whether there are other programs operating the patrol device, exit the relevant program or check the connection.
Prompt the device to deny access
For example, as shown in the following figure:
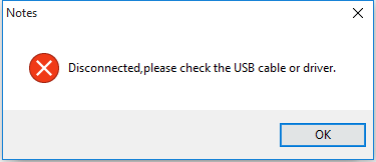
If this prompt appears, please check if other programs are operating the patrol machine, exit the related program, wait a few seconds and try again.
There is no response problem when connecting multiple patrol machines
In addition to the device management menu, which can be connected to multiple patrol machines, if you need to operate the menu items of the patrol machine, please connect a single device.
Problems after reinstalling the software
When uninstalling, third-party security software prompts to clear residual problems
When reinstalling the software, after uninstalling the old version, if the security software prompts you to clear the residual directories and files, please do not select Yes to clear them. The retained files are the database and configuration files of the software. If the historical data and configuration are cleared, they cannot be retrieved. Remember.
The problem of trying to restore the original database after reinstallation
Note: If you still need the data in the old database before uninstalling, please backup and save the configuration file in the database management module for recovery after reinstallation!
If the data in the original database is missing after reinstallation, please do the following:
Using the ACCESS database
Find the directory backup where the backup was stored after the last installation and use of the software (the directory where the database backup is stored, is in the software installation directory by default, if you choose another directory for backup, it will be in another directory, please back up the database before uninstalling) and dataBase ( The directory where the database is stored is in the software installation directory by default, and if another directory is selected for backup, it is in another directory), copy or move these two folders to the newly selected backup and database directory of the software, and re-install it. Start the software to restore the original data.
Using an MSSQL database
Find the directory backup where the backup is stored after the last installation and use of the software (the directory where the database backup is stored, is in the software installation directory by default, if you choose another directory for backup, it will be in another directory, please back up the database before uninstalling), copy or Move to the newly selected backup directory, open the database management module of this software, and select the backup just copied or moved to restore.
Error message when importing
The format error is displayed when importing personnel or patrol points. Please refer to the format of import and export template files in the installation directory of this software.
SQL Server automatic backup plan, restore database using backup data files
Automatic backup of SQL Server databases
Open the Windows Start menu on the server where SQL Server is installed, find and run "SQL Server ManagementStudio", as shown in the following figure:
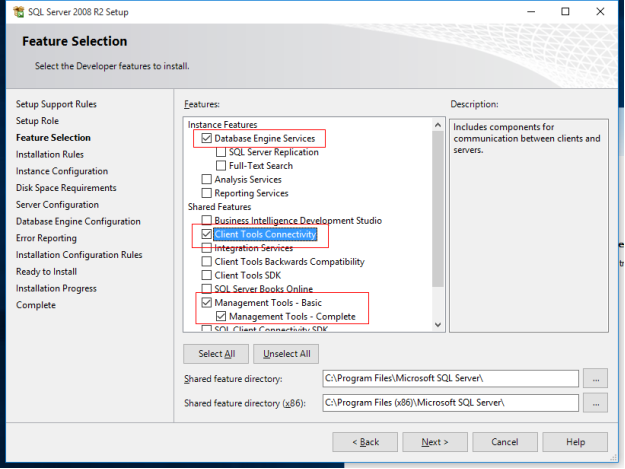
Tip: Please operate the restore operation of the database carefully. If the software runs for a long time, there will be multiple backups at different time points. The data at different time points are different. Please choose the backup you want to restore to the time you want carefully. It is a high-risk operation for data, please be careful to avoid data loss caused by restoring data to a point in time that is not what you want! Before operation, please understand database operation related knowledge.
log file
There is a Log folder in the software installation directory, which is the folder for storing logs. The log files (files with log suffixes) inside can be cleaned up after a period of time. As shown below: