Offline installation of access control machine
Before installing the access control machine offline, please prepare a multi-function USB reader (and connect it to the computer), and multiple IC blank cards, and then open the management software, (if you do not open [Manually Add Device] function, then you first go to the [Help] menu in the management software, click [Function Enable], enter the management password (default 0000), enter the interface, select [Manually add device]), in the main interface of the system, click [Install Device] ]--->[Manual installation of access control equipment], as shown below:

Click [Add access control device manually], the window as shown below will pop up:
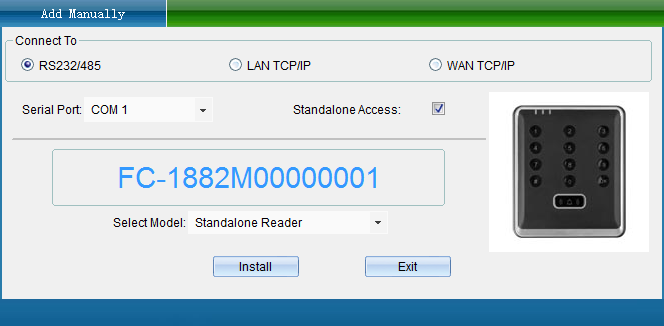
Check "Select Offline Series Access Control System", then select "Offline Access Control All-in-One Machine" in "Please Select Device Model", and then click [Install Device], the interface is as shown below:
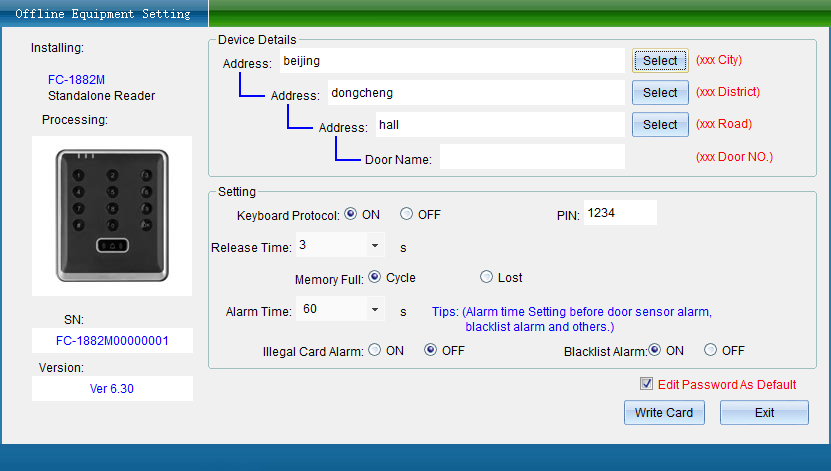
Correspondingly input the relevant information and set various parameters, put a blank IC card on the FC-502MS multi-function card writer, (the card writer driver needs to be installed: the USB Reader Drive in the root directory of the system. EXE, plug in the USB card writer, double-click the driver, and then click [Install].) Then click [Write Setting Card], and the system writes the information of the offline access control all-in-one into the IC card. The interface is as shown below:
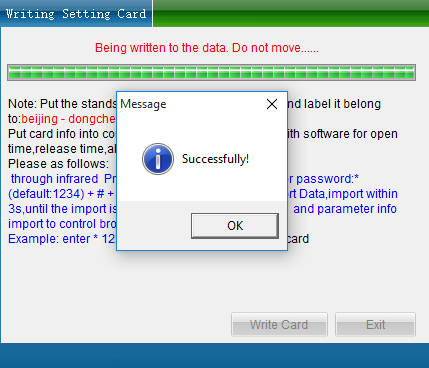
Finally click [OK]. And you only need to take the card to the offline access control machine, and input the card reading command through the infrared remote control: *Administrative password (default 1234) #98# Read the card, and the offline access control machine will automatically import the data in the card to In the all-in-one device, the identity information of the offline access control all-in-one machine is consistent with that added by the software. (After the data is corresponding, you can use the offline function to manage the offline access control machine)
Set IC card parameters
To set the offline access control IC card password, in the main interface, click [Access Control Information] > [Offline Access Control] > [IC Card Parameters] as shown in the figure below:
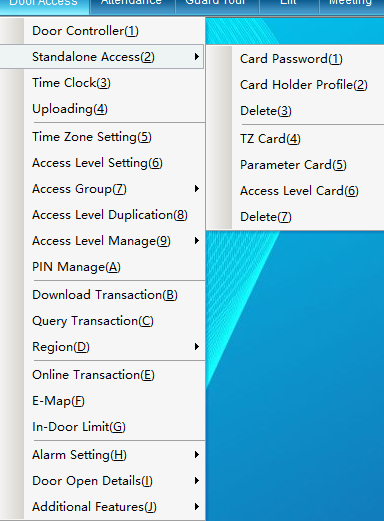
Click [IC Card Parameters] to enter the interface as shown below:
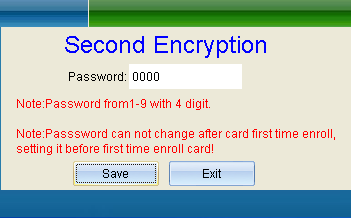
In this window, set the encryption password used by the IC card, enter the encryption password of the IC card, click the [Save] button, and then click the [OK] button after reading the pop-up prompt box. Note: Since the encryption password of the IC card is the basis for reading and writing the IC card, the change of the encryption password of the IC card must be handled carefully to ensure the security of the data in the IC card and prevent the data in the card from being arbitrarily read and written by others.
card issuance
Click [Access Control Information]--->[Offline Access Control]--->[Card Issue], as shown below:
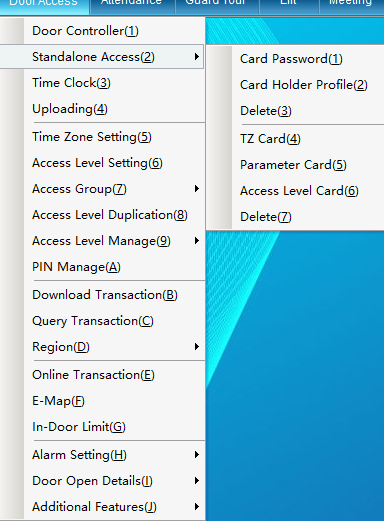
Click [Issue Card], and the interface as shown below will pop up:
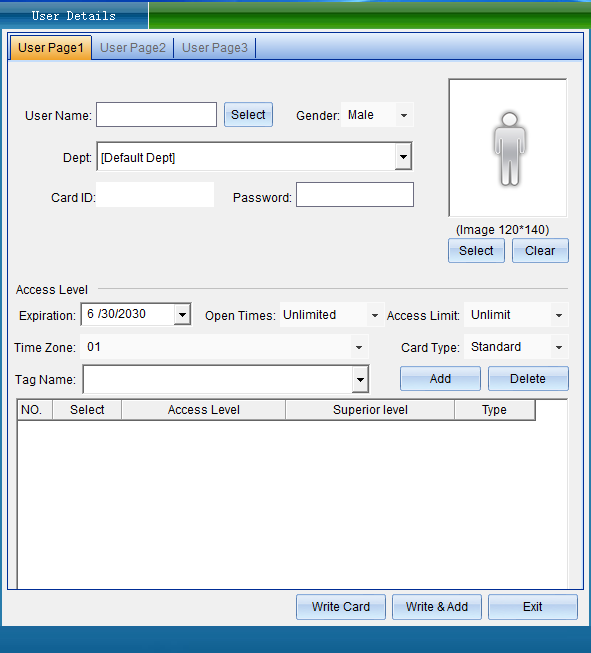
Before issuing the card offline, put the card on the USB multi-function card writer, and then enter the relevant personnel information on this interface. Please carefully select the personnel information or enter the personnel information, select the cardholder content correspondingly, and select the door to be opened. , the interface is as shown below:
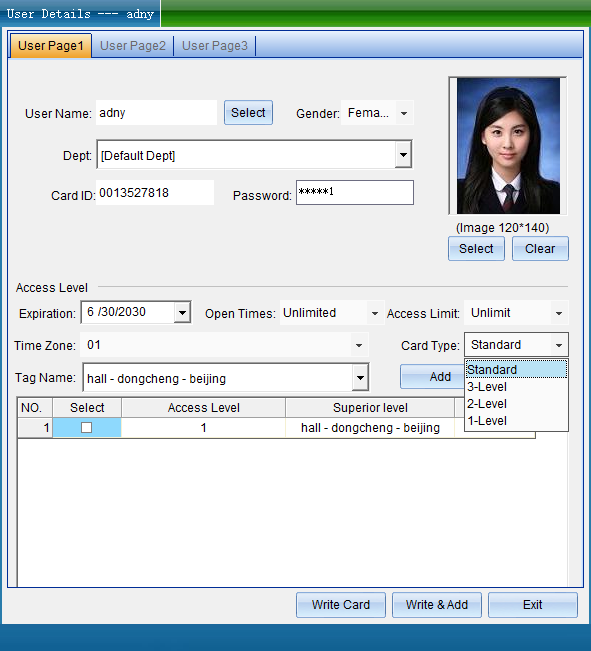
Enter the name, or select the person who has not issued the card, select the gender of the person, select the department to which the person belongs, enter the ID number and contact number, upload the person's photo, set the number of door openings and access restrictions, and set the IC card type and the corresponding permission location.
When choosing the type of IC card, you need to pay attention to the authority of the card type, and you can set the corresponding card type according to the actual needs.
There are four types of IC cards: ordinary door opening card, third-level authorization card, second-level authorization card, and first-level authorization card.
The four IC card authorization levels are: first-level authorization card > second-level authorization card > third-level authorization card > ordinary door opening card.
Ordinary door opening card: can only open the door of Unit 1, Floor 008, Building A2, Tangde Community. As shown below:
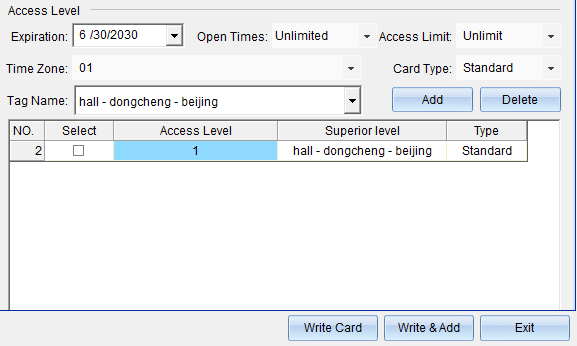
Level 3 permission card: It can effectively open all doors on the 008th floor of Building A2, Tangde Community. As shown below:
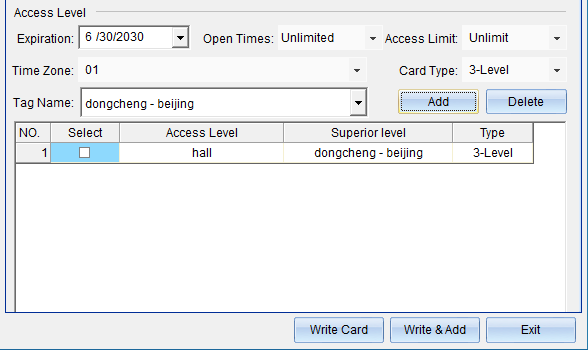
Level 2 permission card: It can effectively open all doors in Building A2 of Tangde Community. As shown below:
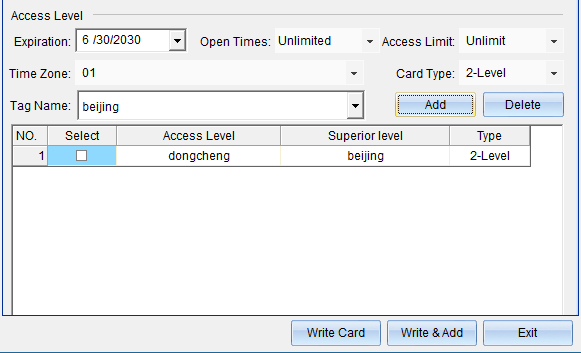
Level 1 permission card: It can effectively open all doors of a whole Tangde community. As shown below:
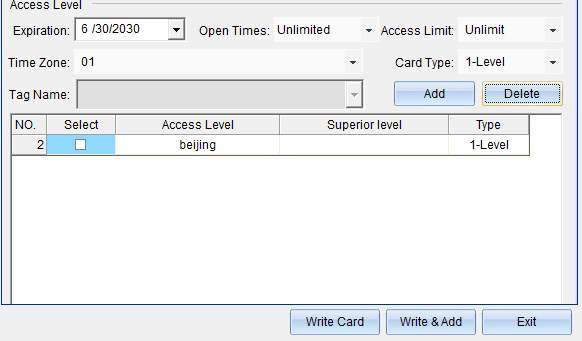
After selecting the card type, you can also enter or modify relevant information in the "Details" - "Residence" - "Labor Status" option. As shown below:
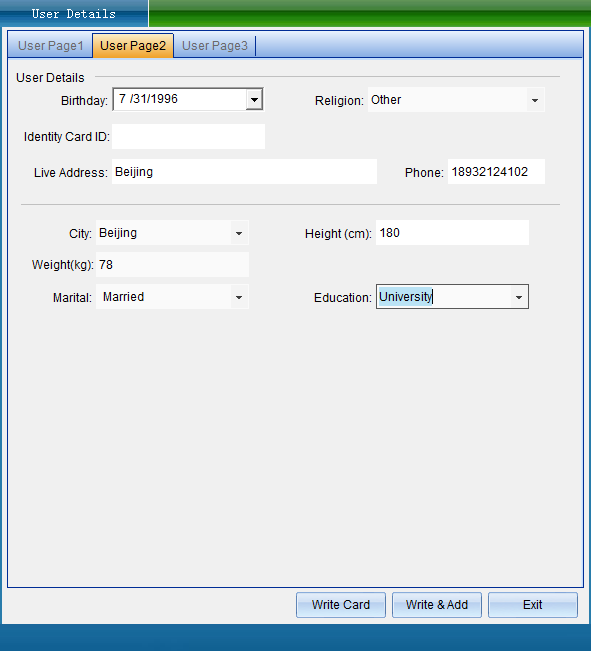
After all the information is entered and confirmed to be correct, put the card on the card writer and click [Write Card]. The window "IC card issued successfully" as shown in the figure pops up, click [OK], then the card is issued successfully. After writing the data, the card supports opening the specified door.
Pin card
Cancel card: It is to cancel the authorization of the card that has been authorized in the card lock.
In the main interface of the system, click [Access Control Information] -> [Offline Access Control] -> [Put Card], as shown in the following figure:
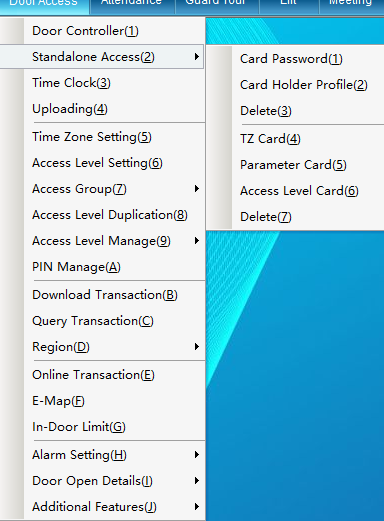
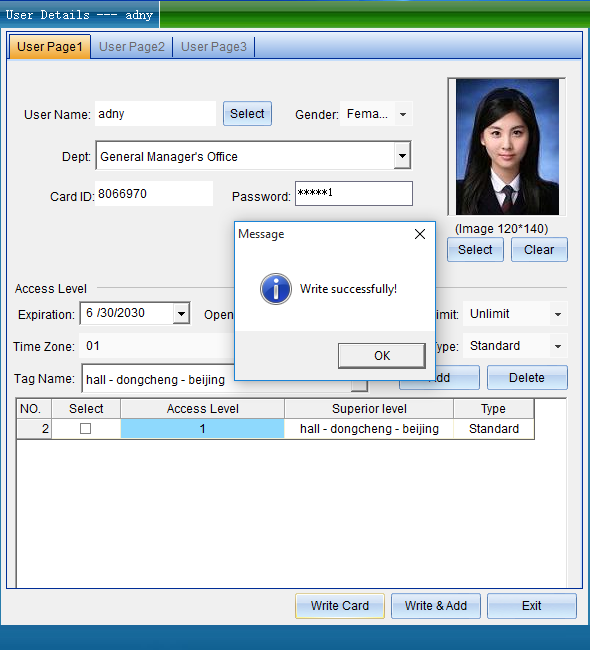
Click [Cancel Card], then put the card on the card issuer, read the card information, click [Cancel Card] in the "Cancel Card" interface, a query window will pop up, click [Yes], after the card is successfully cancelled, click 【quit】. The interface is as shown below:
Make a setup card
Setting card: It is to use a blank card, write the data parameters set on the system into the blank card, and then use the blank card that has been set (ie the setting card) to import the data into the offline access control all-in-one machine, And it should be indicated that the setting card is the setting card of a certain access control machine.
There are three types of setting cards: door opening time setting card, access control parameter setting card, and access control authorization setting card.
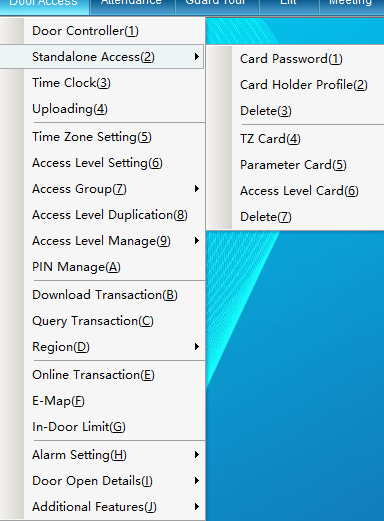
In the main interface of the system, click [Access Control Information] ---> [Offline Access Control] under [Opening Period Setting Card], [Access Control Parameter Setting Card], [Access Control Authorization Setting Card], as shown in the following figure:
(1) Opening time period setting card
Door opening period setting card: import the door opening period set in the system into the access control all-in-one machine, and make it into the door opening period setting card, you can use this card to set all offline access control of the same series.
Click [Access Control Information] -> [Offline Access Control] -> [Opening Period Setting Card], then put a set setting card on the card writer, click [Write Card], the lock opening period parameters will be Automatically write it into the IC card, make the card into the door opening time card of the offline access control machine, and finally click [OK] and then click [Exit]. The interface is as shown below:
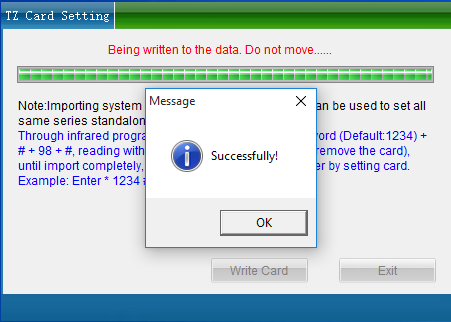
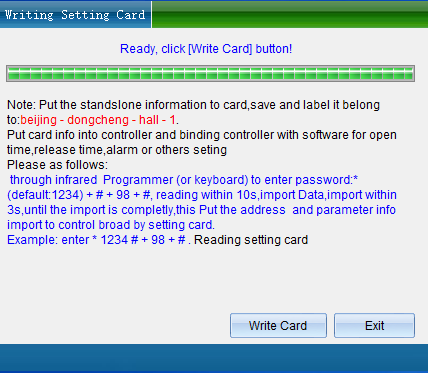
Then click [Yes], and then click [OK] after a prompt pops up. The interface is as shown below:
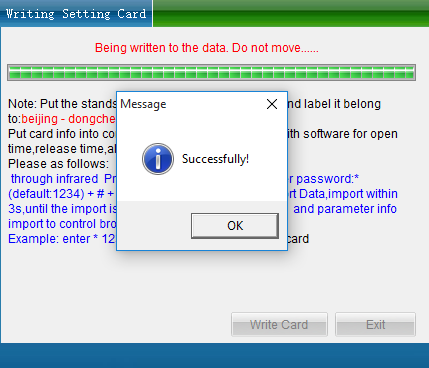
Finally, use the setting card to set parameters on the access control all-in-one machine, use the remote control to press the infrared interface of the access control all-in-one machine: *+1234+#+98+#+ to read the setting card to complete, press the * key twice to exit the management state.
(3) Creation of permission data card
Click [Access Control Information]--->[Offline Access Control]--->[Access Control Authorization Setting Card], here you can operate 175 door opening cards or 175 blacklist cards or report the loss of 175 door opening cards at one time, please Put the set card on the card issuer, confirm that the information content of the person to be authorized has been selected, and click [Yes]. The interface is as shown below:
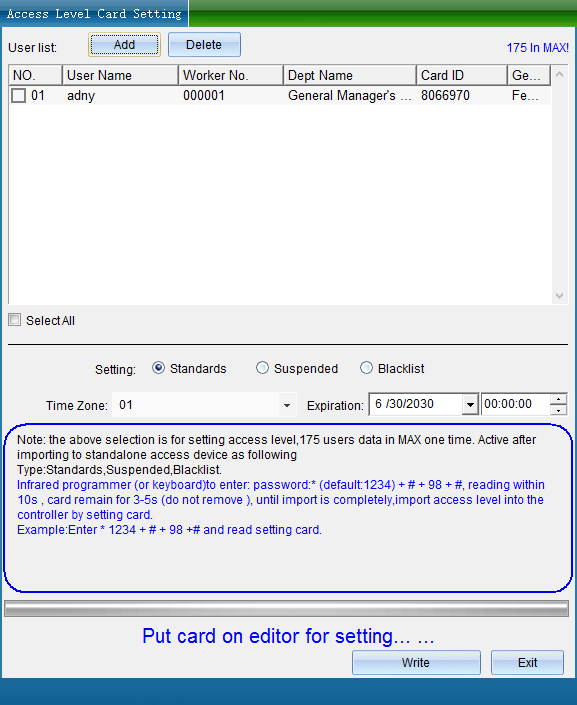
After the pop-up permission data card is created, click [OK] and then click [Exit]. As shown below:
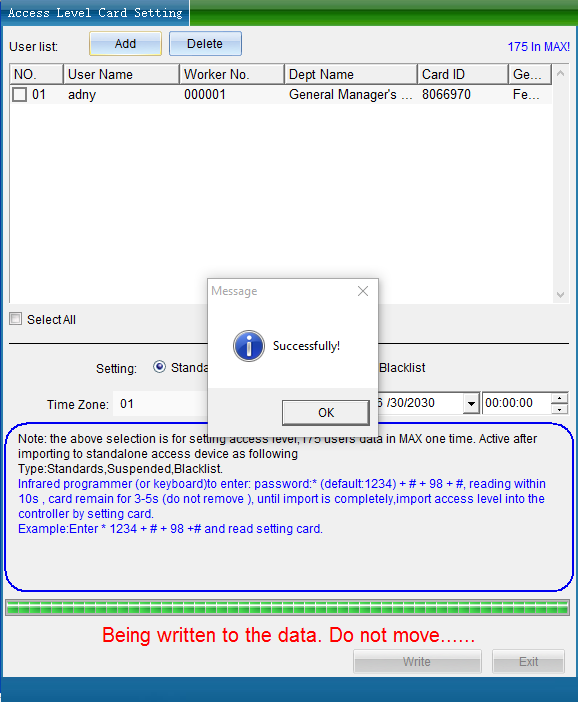
If you want to import these data into the offline access control all-in-one machine, then you only need to take the card to the access control all-in-one machine, and input the command through the infrared remote control: *1234#98#, read permission setting card. Then the content in the permission setting card is imported to the access control all-in-one.
logout settings card
If you want to cancel the setting card of the access control all-in-one machine, you can click [Access Control Information] > [Offline Access Control] > [Cancel Setting Card] in the main interface of the system. As shown below:
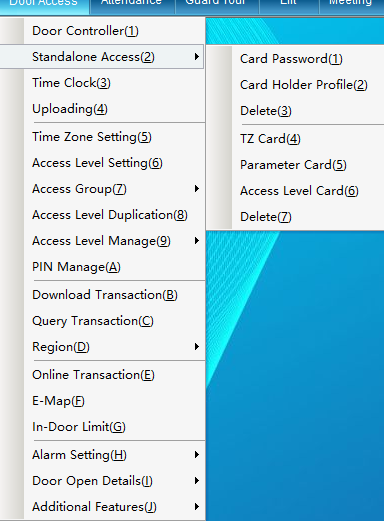
Put the setting card on the card writer, click [Logout setting card], and the following window will pop up:
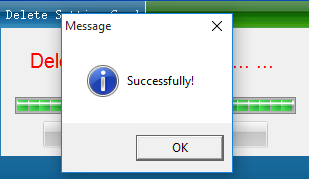
Click [Logout], a prompt window will pop up, as shown in the figure above, click [OK], after the setting card is logged out.
Body keyboard management
(RESET)
Press and hold the RESET button, wait for 2 seconds to hear the prompt tone (di) and release it, the access control will restore the management password to the factory default value (1234). .drop), you can disconnect the RESET button, at this time, the access control will automatically initialize until the access control sends out the end prompt sound. Initialize the device, all card data, management passwords, etc. are all cleared or restored to factory defaults. (Delete all cards, restore all parameters, restore management password: 1234)
Management Status Command List:
Login management status: *+Management password#
Default admin password: 1234
Exit management status: *
In the management state, enter * to exit the management state. If it is under a subordinate operation command of the management state, you need to enter ** to exit the management state. In the management state, the indicator light flashes, and the work indicator light turns on after exiting the management state.
Note: The following commands are only valid in the administrative state. (In the management state, if there is no keyboard operation for 10 seconds, the program will automatically exit the management state)
card issuing password
Card number issuance: 10+#+card number+#
If there are two sets of digital card numbers printed on the card, please use a 10-digit decimal card number
Enter the card number and report the loss of the card: 13+#+card number+#
The card number is 10 digits, only valid digits can be entered, and the leading 0 can be omitted
Enter card number and blacklist card: 14+#+card number+#
The card number is 10 digits, only valid digits can be entered, and the leading 0 can be omitted
Quick add card: 20+# card reading
Can read multiple cards simultaneously for simultaneous registration
Self-numbered card issuance: 21++ card reader + 3 self-numbered +#
It is easy to remember. For example, if a certain card is issued in room 302 for use (the self-number is 302), the card number corresponds to the room number, which is easy to remember.
Add wireless remote control: 22+#+press the remote control send key+3-digit number+#
This lock only supports 001 to 050 self-numbering, please do not exceed this range when operating 3-digit self-numbering
Add mother card: 23+#+ read mother card
Master card plus card: Read the master card twice in a row, enter into the master card plus card mode, you can read the card continuously for card issuance,
Master card deletion: In the non-management state, read the master card once, enter the card deletion mode, read the card to be deleted twice in a row, and then read the master card again to confirm, and delete the card uniformly
Delete card delete password
Do not delete the card when you swipe the card: 30+# to read the card
Multiple registered cards can be read continuously for deletion. If the card reading is stopped for 10 seconds, the program will automatically exit the management state
Card number deletion: 31+#card number+#
If there are two sets of digital card numbers printed on the card, please use a 10-digit decimal card number
Self-numbered card deletion: 32+#+3-digit number+#
After input, the card corresponding to the 3-digit self-number will be deleted
To delete a single wireless remote control: 33+#+3-digit number+#
After input, the remote control corresponding to the 3-digit self-number will be deleted
Delete all wireless remotes: 34+#
The door opening permission of all wireless remote controls will be removed
Delete all door opening data at one time: 40+#
After the command is executed, the access control will clear the data such as the remote control card to open the door.
Change parameters
Modify administrator password: 60+#+4-8 new administrator password+#+Repeat 4-8 new administrator password+#
When changing the new management password, you need to confirm the new password twice. When entering, the two passwords should be the same, otherwise it will be unsuccessful.
Modify the door-opening timeout prompt: 63+#+3-digit door-opening timeout time+#
When 000 is entered, the door opening timeout prompt function is turned off. The unit is seconds (the maximum can be set to 255 seconds)
Modify the alarm duration: 64+#+3-digit alarm duration+#
When 000 is input (default), the alarm is turned off, and when 255 is input, the alarm time is not limited
Modify the door opening delay time: 66+ #+3 digit door opening delay time+#
When 000 is entered, it is set to 0.5 seconds, the default is 3 seconds, and the longest is 65535 seconds
Anti-detection door opening password: 68+#+1-digit number of errors+2-digit lock duration+#
When 999 is entered (default), if someone enters the wrong password 9 times, the access control will self-lock for 99 seconds
Restore Factory
Restore factory default: 70+#
All parameters are automatically restored to factory defaults after the command is input. (Delete all cards, restore all parameters, restore management password: 1234)
Open and close commands (IC models do not have anti-duplication card interception function)
Enable communication function: 81+#
After input, the access control will open the communication function (default)
Close the communication function: 82+#
After the input, the access control will close the communication function (to prevent the computer from setting the access control)
Set normally open: 83+#
After the setting is successful, the access control is always open.
Set electric lock normally closed: 84+#
After the setting is successful, the access control is normally closed.
Open all cards to open the door: 85+#
After the setting is successful, in the non-management state, as long as the card is read, the door will be opened.
Enable full card door opening + auto registration: 86+#
After the setting is successful, in the non-management state, as long as the card is read, the door will be opened. If the card is not registered, it will be registered at the same time.
Close the full card to open the door; 87+#
Disable full card function mode
Data import
Data import: 98+ #+ read data card or read mother card + read data card
Note: When reading the card to import data, the data card cannot leave the card reading position